Photography Insight: 7 Things to Know Before Printing Your Photos
Printing your photos is an exciting way to bring your work to life or earn a side income from your photography, but it’s essential to understand the process to avoid common mistakes. From preparing your images to selecting the right paper, this guide offers a quick overview of what you need to know before printing. For a more in-depth understanding, particularly if you’re looking to sell prints, check out the Print Store Course, designed to help you create and manage your own successful print store.
Not many people know this, but I ran a print lab and gallery for six years, operating a giant old school wet lab with tanks (oh the cleaning!) and paper rolls, plus large format Epson Printers and dry labs. I learnt very quickly that printing can appear complicated, and it’s easy to get overwhelmed and give up. But, that’s not as fun as seeing your photographs printed on fine art paper, unrolling a fresh print and seeing your work hung on walls! So let’s get into some tips that will help you understand the printing process a little better.
If you’re keen to sell prints, there are some more factors involved regarding logistics, maintaining quality, consistency and the sales/marketing process, that’s all detailed within the course so you can follow at your own pace.
Quality Matters when Printing
Before sending your images to a printer, ensure they’re properly prepared and sized, a low resolution file will print grainy and lack detail, perhaps even have saturation blotches, whereas a file that’s prepared and of a high quality, should print well up to the larger sizes. If you captured an image on your phone, it may need resizing before you print in a larger format, most images captured on modern cameras however, should be able to print without issue up to around 20x30inches (this is from my experience, some tech whizzes may disagree). Confirming the file format requirements of your chosen print lab can also be the difference between crazy saturated prints and what you see on your screen, more on that in colour profiles below.
DPI vs PPI: What’s the Difference?
Understanding DPI (dots per inch) and PPI (pixels per inch) is vital for achieving sharp, high-quality prints.
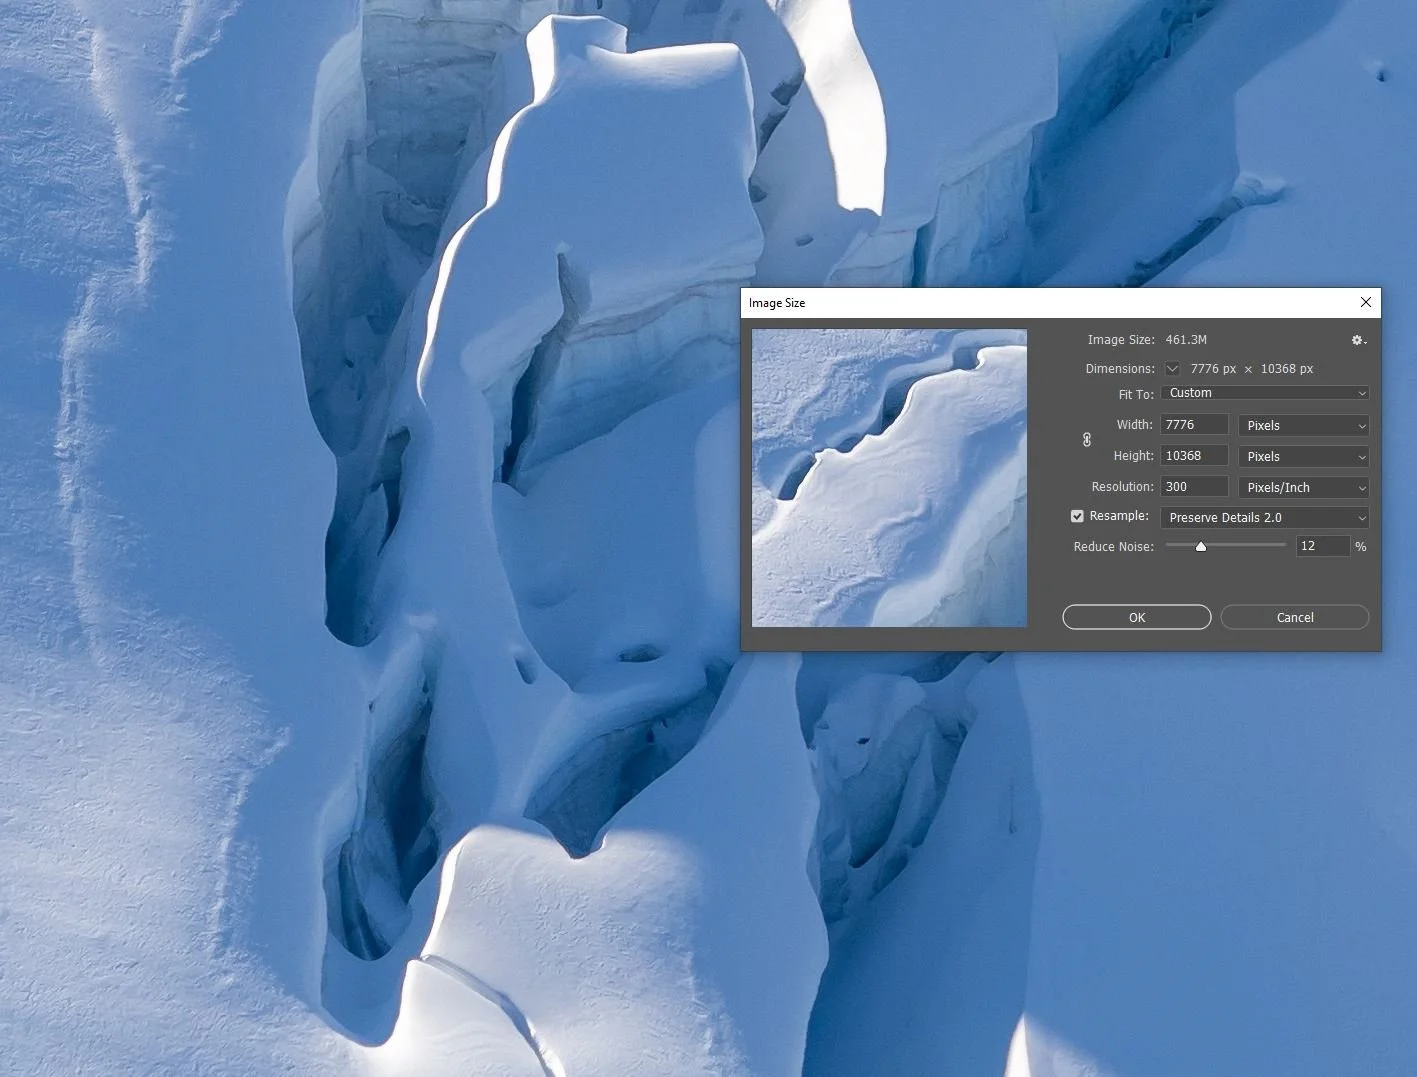
PPI refers to the pixel density in your digital image. A PPI of 300 is generally recommended for clear and detailed prints.
DPI is the printer’s resolution, determining the density of ink dots applied to the paper.
Ensuring your image’s PPI aligns with the printer’s DPI requirements will help maintain detail and clarity in your prints.
*If you’re unsure, set it at 300 :)
Sizing Your Image Files for Print
Properly sizing your image files is critical to avoid pixelation or unwanted cropping. Determine the exact dimensions required for your desired print size, and ensure your file resolution supports those dimensions at 300 PPI. Be mindful of aspect ratios, as resizing can sometimes distort your image if not done carefully.
You can resize in your chosen editing program like Lightroom or Photoshop, use your labs software if they offer this option, or if you need your image enlarged and the quality improved, you may need to use a program like Topaz Gigapixel.
Choosing the Right Paper Type
The paper you select significantly impacts the final look of your print. Here’s a quick rundown of popular options:
Glossy Paper: Vibrant colours and a shiny finish, but prone to reflections and fingerprints.
Matte or Lustre Paper: Soft, non-reflective finish, ideal for a fine art feel or muted tones. (a great go-to in my opinion!)
Fine Art Papers: High-quality, archival papers with a range of textures that add depth and a professional touch.
Canvas: Offers a painterly effect, perfect for larger prints or gallery displays, and can be stretched or framed.
There are also metallic, foamcore, wooden…take a peek at a print lab, you’ll see the options are endless!
How Paper Selection Impacts White Tones and Texture
White tones and textures play a key role in how your image appears on paper. Bright white paper enhances contrast and vibrancy, while off-white or natural-toned paper creates a softer, warmer effect so consider the tones you’ve already got within your image, and which paper may suit them best. Textured paper can add an artistic quality, while smoother surfaces showcase finer details.
Colour Profiles and Printer Settings
To avoid unexpected results, save your file with the correct colour profile, such as sRGB, CMYK or Adobe RGB, depending on the printers requirements. Double-check guidelines for file formats and dimensions to ensure compatibility with the print lab. I learnt how dramatic the difference can be after printing 500 postcards that arrived so crazy vibrant and saturated after I sent an RGB file to a printer that required CMYK….yikes!!
Test Prints: A Small Investment for Perfect Results
If you’re printing with a new lab or experimenting with paper types, start with a small test print. This step helps you evaluate colour accuracy, paper choice, and overall quality before committing to larger prints. Some labs offer paper sample packs, but seeing test prints with your own images really helps to visualise how the larger result will appear.
Are you ready to sell prints?
The Print Store Launch Pad is your step-by-step program to start selling prints, filled with essential knowledge, insights, and steps to take action easily (without making the mistakes I did!). Guiding you from print preparation and creating collections, to web development, finding customers and shipping orders! It’s an ideal self-paced course for you if you’re struggling to make sales, don’t know where to start, or are overwhelmed by the logistics, file prep, marketing and sales process of selling prints.
“I had no idea about the many in-depth moving parts that need to work cohesively together to ensure my print store succeeds. Every single module in this course has demystified the print store process for me, and I now have a business and marketing strategy to ensure my print store and photography business will be successful.” Deb, Australia.
Don’t forget: If you’re a member of The Travel Photography Club, use your code to receive 15% off!


